Start These Recipes at least 4 days before you want to eat it
Dinner Table Rating ![]()
![]()
![]()
![]()
![]()
![]()
1 thumb per family member
Cook’s Rating ![]()
![]()
![]()
Accessibility of ingredients, ease of preparation, and affordability
As I considered which recipes to be trying out on our tour through Nourishing Traditions, I kept choosing ones that required whey. Once I realized this, I decided that the making of whey would be essential to my ability to cook from this book. So I turned to the recipe for Whey and Cream Cheese. But in order to make it, I first had to make the Piima Milk…..and in order to make the Piima Milk, I first had to make the Piima Starter Culture. I confess, I was a bit daunted. But I was also determined, so took a breath or two and started at the very beginning (a very good place to start).
Sally notes at the beginning of the cultured dairy chapter that “milk culturing is an art”. I understood this to mean that I should feel free to use my intuition within the confines of the instructions, and I think you should, too.
Piima Starter Culture (page 82)
- 1 cup good quality cream
- 1 envelope piima powder
Sally Fallon is a huge promoter of using raw, unpasteurized, unhomogenized milk products. Her philosophy is well-reasoned and well-supported (you can read more about why raw milk is better here and here). In our state (and in most states), we’re not able to purchase true raw milk in grocery stores. You can only drink raw milk from an animal that you own. So here, raw milk is sold from farms in shares. You buy a share of a cow, and you get a share of her milk. Pretty sneaky.
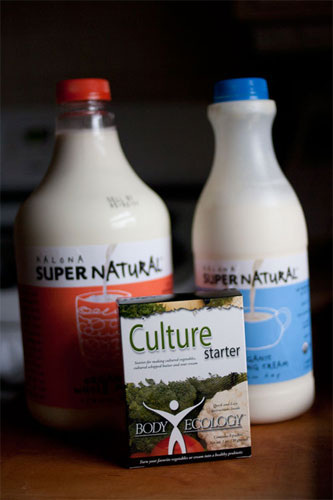
It’s not that I disagree with the raw milk philosophy, it’s just that our budget doesn’t allow for a raw milk share right now. So I needed to find a compromise, one that would still give me most of those benefits but would be a little easier on the pocket book. I was happy to find the Supernatural brand of milk at our health food store. It’s from grass-fed cows, is unhomogenized and is low-temperature pasteurized. It’s about as close as I can get to raw milk in the grocery store. So it’s what I bought.
That took care of the first ingredient. On to the culture.
The piima culture is a specific culture from the milk of cows that have eaten the butterwort plant. Apparently farmers in Scandinavia have known for centuries that milk clabbers better when cows eat this herb.
I couldn’t find piima culture in the store. Sally lists a few websites in her list of resources where you can mail order it. But I’d already bought my milk and couldn’t wait for the culture to come by mail. I bought the closest thing I could find, a culture starter from Body Ecology. I don’t know how the piima culture works, but this one worked great too.
It took some searching to find the right ingredients, and they were somewhat pricey. But having found them, they’ll be a piece of cake to pick up again (they were all at our local natural food store). So I’m giving these recipes a star for accessibility. And while I recognize that the expense of the culture is somewhat tempered by the fact that it should last a long time, it’s still more expensive than, say, a bag of wheat berries or some veggies. I’m choosing to withhold the affordability star.
So, having gathered my ingredients, I was ready to make some starter culture.
Why culture your dairy? Fermentation breaks down casein, the protein in milk. Casein is one of the most difficult proteins to digest. Culturing also restores lactase to the dairy. Lactase occurs naturally in raw milk, but is destroyed during pasteurization. It is the enzyme that helps your body digest lactose (milk sugar). So by culturing your dairy, you are pre-digesting the most difficult parts of the dairy–the parts that your body probably struggles to break down on its own.
Sally claims that regularly consuming cultured dairy products can lower cholesterol and protect against bone loss. The beneficial bacteria and lactic acid in cultured diary products guard against infectious illness, keep pathogens at bay, and aid in digestion of all the other food you eat.
1. Find a place in your house where the temperature is a fairly constant 72-75 degrees. Place the cream in an impeccably clean glass jar.
2. Stir in the piima powder and cover tightly.
3. Leave in a spot that is 72-75 degrees for about 24 hours, or until it thickens slightly.
We have a gas stove, so I put my jar in the stove with the pilot on and think the temperature was just about perfect. This is what mine looked like after 24 hours:
4. Transfer to refrigerator, where it will become firm.
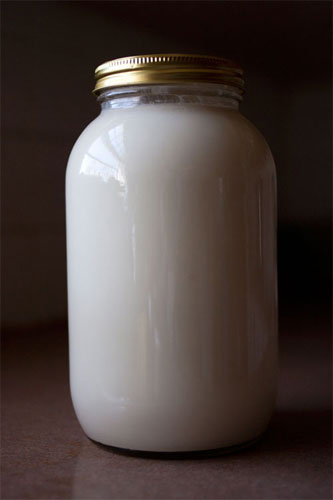
This is what mine looked like after 24 hours in the fridge:
Sally notes that at this point the culture will keep, well-chilled for several months. It should smell like a cross between yogurt and butter. If it smells bad, throw it out and start over.
At this point, I started work on turning my starter culture into cultured milk.
Piima Milk (page 83)
- 1 quart fresh whole milk, nonhmogenized
- 1 tablespoon Piima Starter Culture (see above recipe)
1. Place milk in a clean glass container. Add the starter, stir or shake well, cover tightly and place in a spot where the temperature is a stable 72-75 degrees for 20-24 hours. Chill well.
Umm, does that really need explanation?
You need 2 quarts for the Whey and Cream Cheese recipe, so I made 2 quarts (or 1/2 gallon) using the same brand of Supernatural milk.
Whey and Cream Cheese (page 87)
- 2 quarts Piima MIlk (see above recipe) You can also make this with whole-milk buttermilk or yogurt (whose recipes are in NT) or straight up raw milk.
The instructions are slightly different depending on which you’re using. I used piima milk, so here’s what I did:
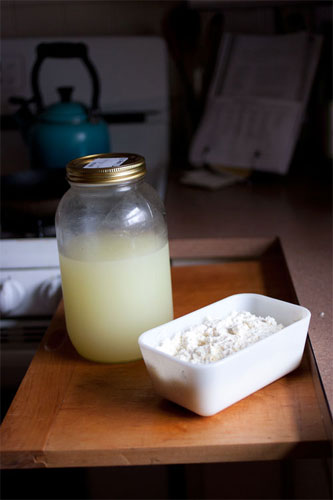
1. Let stand at room temperature 1-2 days until the milk visibly separates into white curds and yellowish whey.
This was pure magic to watch. Without any input from me, this happened all on its own. Mine separated after only 24 hours.
2. Line a large strainer set over a bowl with a clean dish towel.
I put this:
and lined it with a towel. Okay, actually, it’s not a towel, it’s a (very-clean) burp rag.
3. Pour in the yogurt, cover and let stand at room temperature for several hours. The whey will run into the bowl and the milk solids will stay in the strainer.
After an hour or so, I emptied the whey from the bowl, and put the curds back to finish draining.
4. Tie up the towel with the milk solids inside, being careful not to squeeze. Tie this little sack to a wooden spoon placed across the top of a container so that more whey can drip out.
5. When the bag stops dripping, the cheese is ready. Store whey in a mason jar and cream cheese in a covered glass container. Refrigerated, the cream cheese keeps for about 1 month and the whey for about 6 months.
So was it worth it? Definitely. I view these end-products more as ingredients, rather than consumables in and of themselves, but the whole family enjoyed the cream cheese spread on crackers with apples and honey. Well, except for me, who is still dairy-free.
These recipes were so easy, and I don’t see them as being time-consuming. True, I had to do about 5 minutes of work each day for five days. But after that, I didn’t even think about it until the next day.
I also LOVE that it turns something with a short shelf-life and makes into something that keeps for a long time. Once I had that milk in my fridge I fretted and fretted over it souring before I could get around to it. But now I’ve turned it into something that’s going to keep in the fridge for much longer.
Having lain a good foundation, I am ready to use these ingredients in some of those other recipes that looked so very enticing.


