Blog /

Last week we shared a blog post that touched on how to use your freezer to keep inventory of recipe ingredients. This week, we want to elaborate on that topic and teach you exactly how you can use this feature like we do!
Utilizing the Freezer at my house means that I can buy items in bulk, usually at a cheaper price, and have an easy record of items that I have on hand. Once I have those ingredients saved in my Freezer, I can plan my meals based on what I know I have purchased already. This means that I am frequently saving money on groceries, as I am able to stretch the bulk purchases out over several months. Those are all big wins to me!
Using Freezer items alters my planning process. Instead of choosing recipes, then adding them to my planner, I look at what I have on hand and search my recipe book for recipes that include what I already have. I add those recipes to my planner, pull the ingredients from my freezer, then adjust my shopping list. From there, I am ready to go shopping and cook!
For my example process below, I will use frozen meat as an example. This process can be used with any items that you freeze including: fruits, veggies, breads/doughs, sauces, frostings, beans, rice, veggies, or even full frozen meals or casseroles.
Meal Planning from the Freezer Step-by-Step:
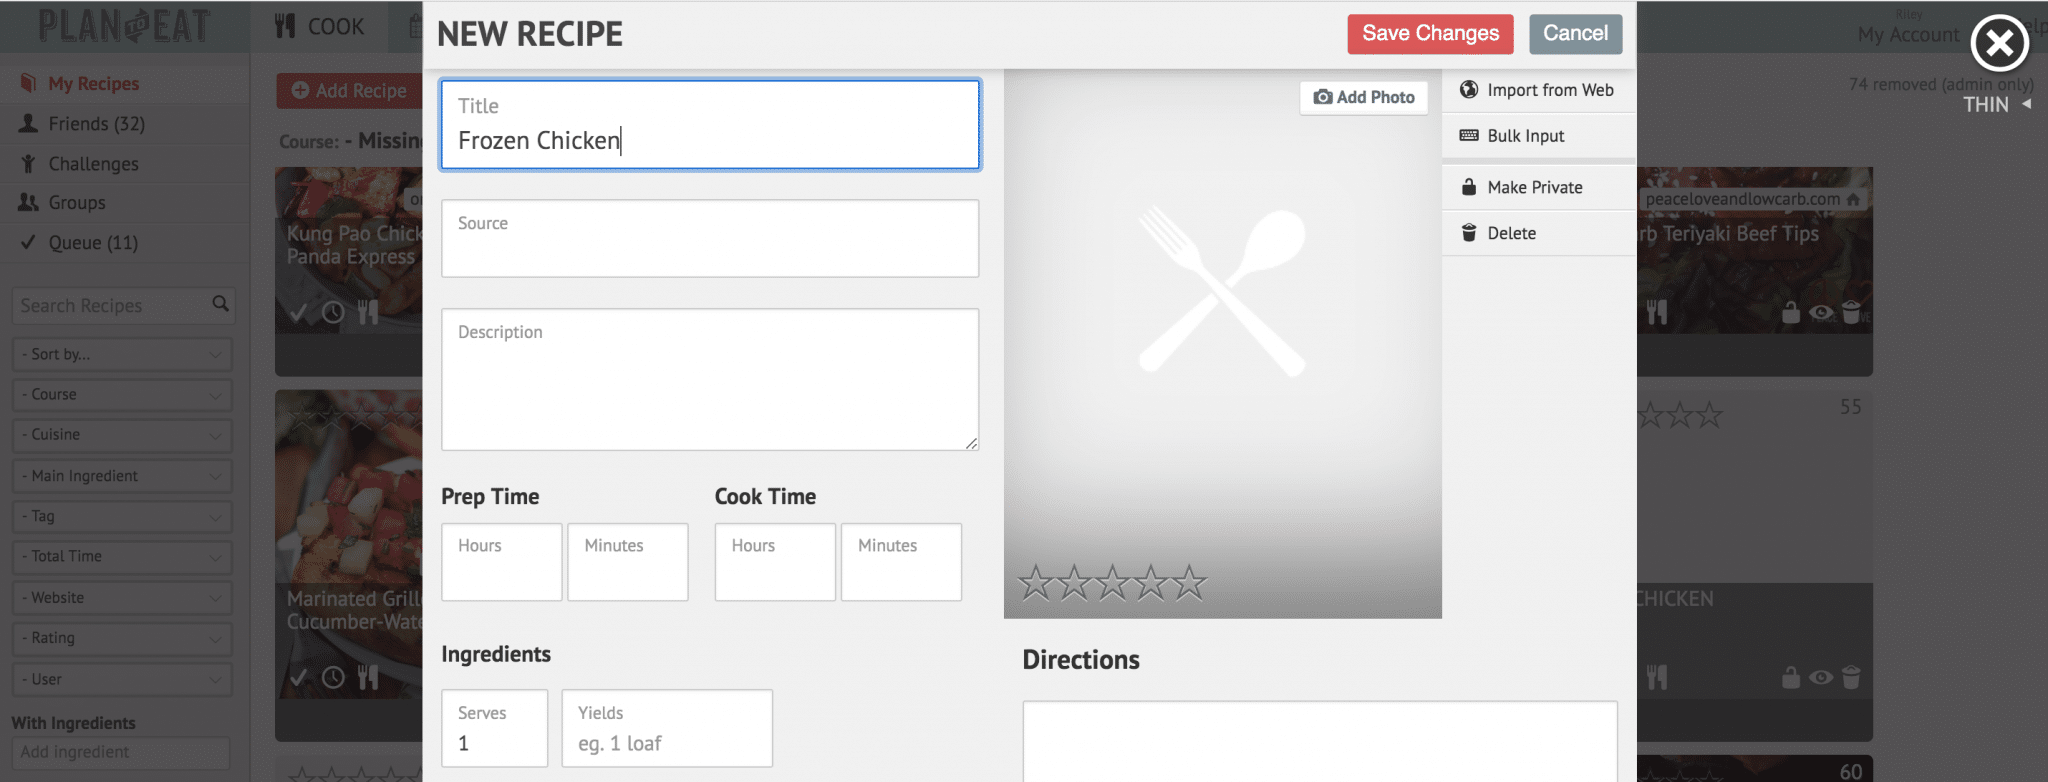
1. Create a recipe for each ingredient you want to freeze. They must be added as recipes first, because only saved recipes can be added to your Plan to Eat Freezer. To do this, press the orange “add recipe” button at the top of your Recipe Book.
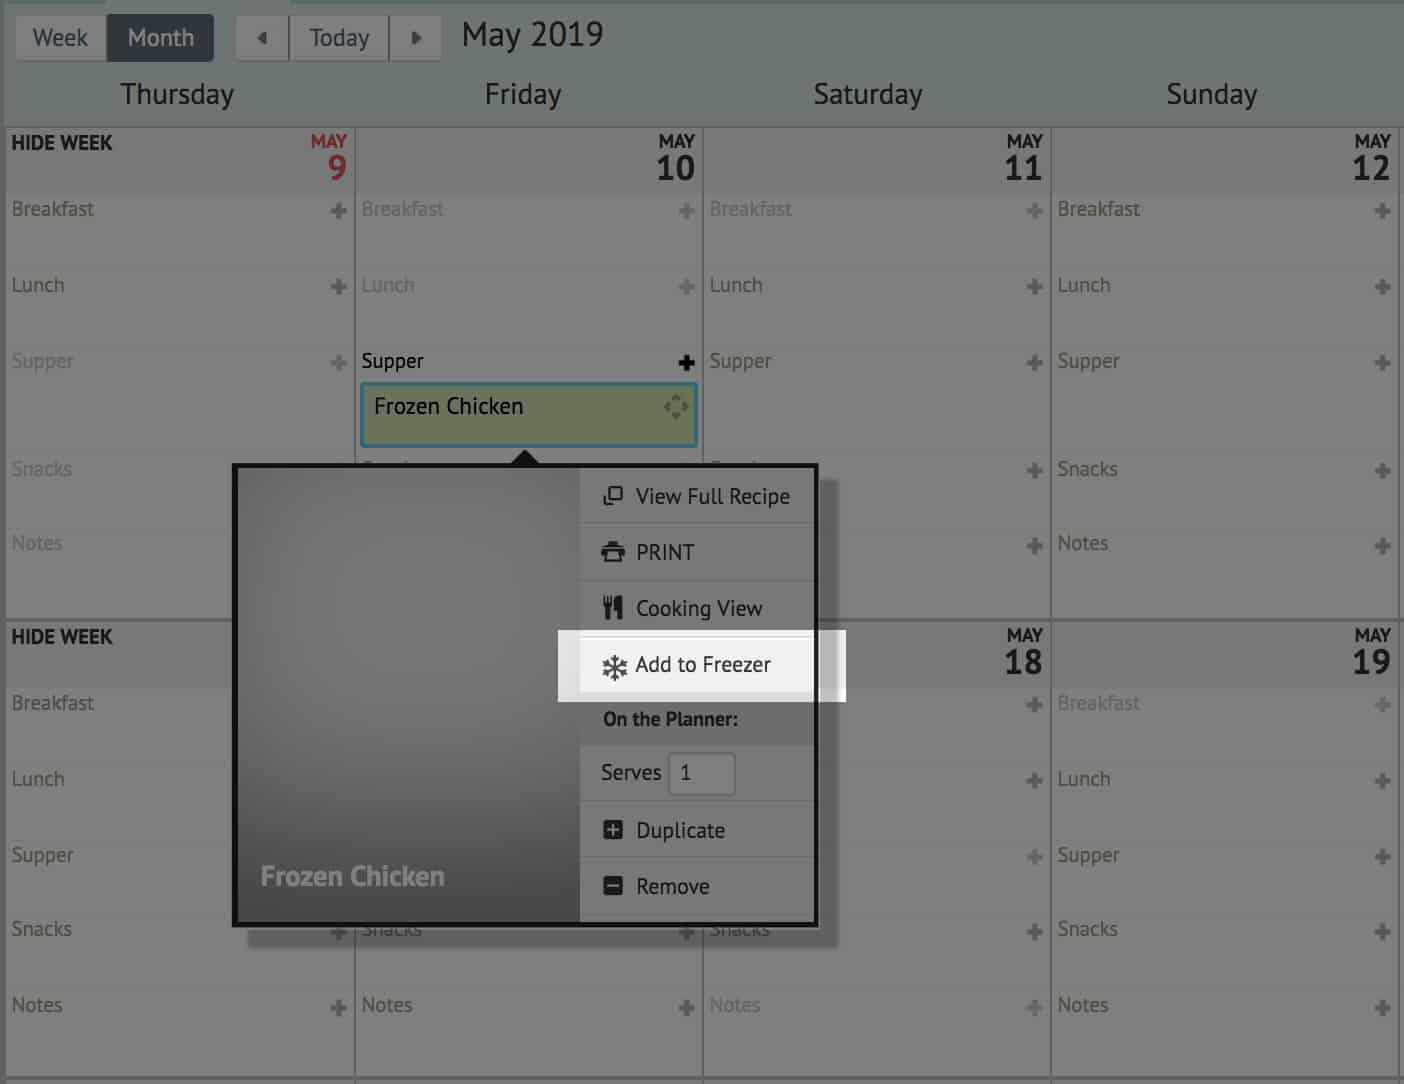
2. Move to your Planner section. Add the meat recipes that you created to your Planner.
3. Once planned, you can add the cut of meat to your freezer (this video will show you how!) and include the number of servings and meals that eat cut you ordered will make. This will give you an accurate count in your freezer.
Now the item is stored in your Freezer and ready to be used!
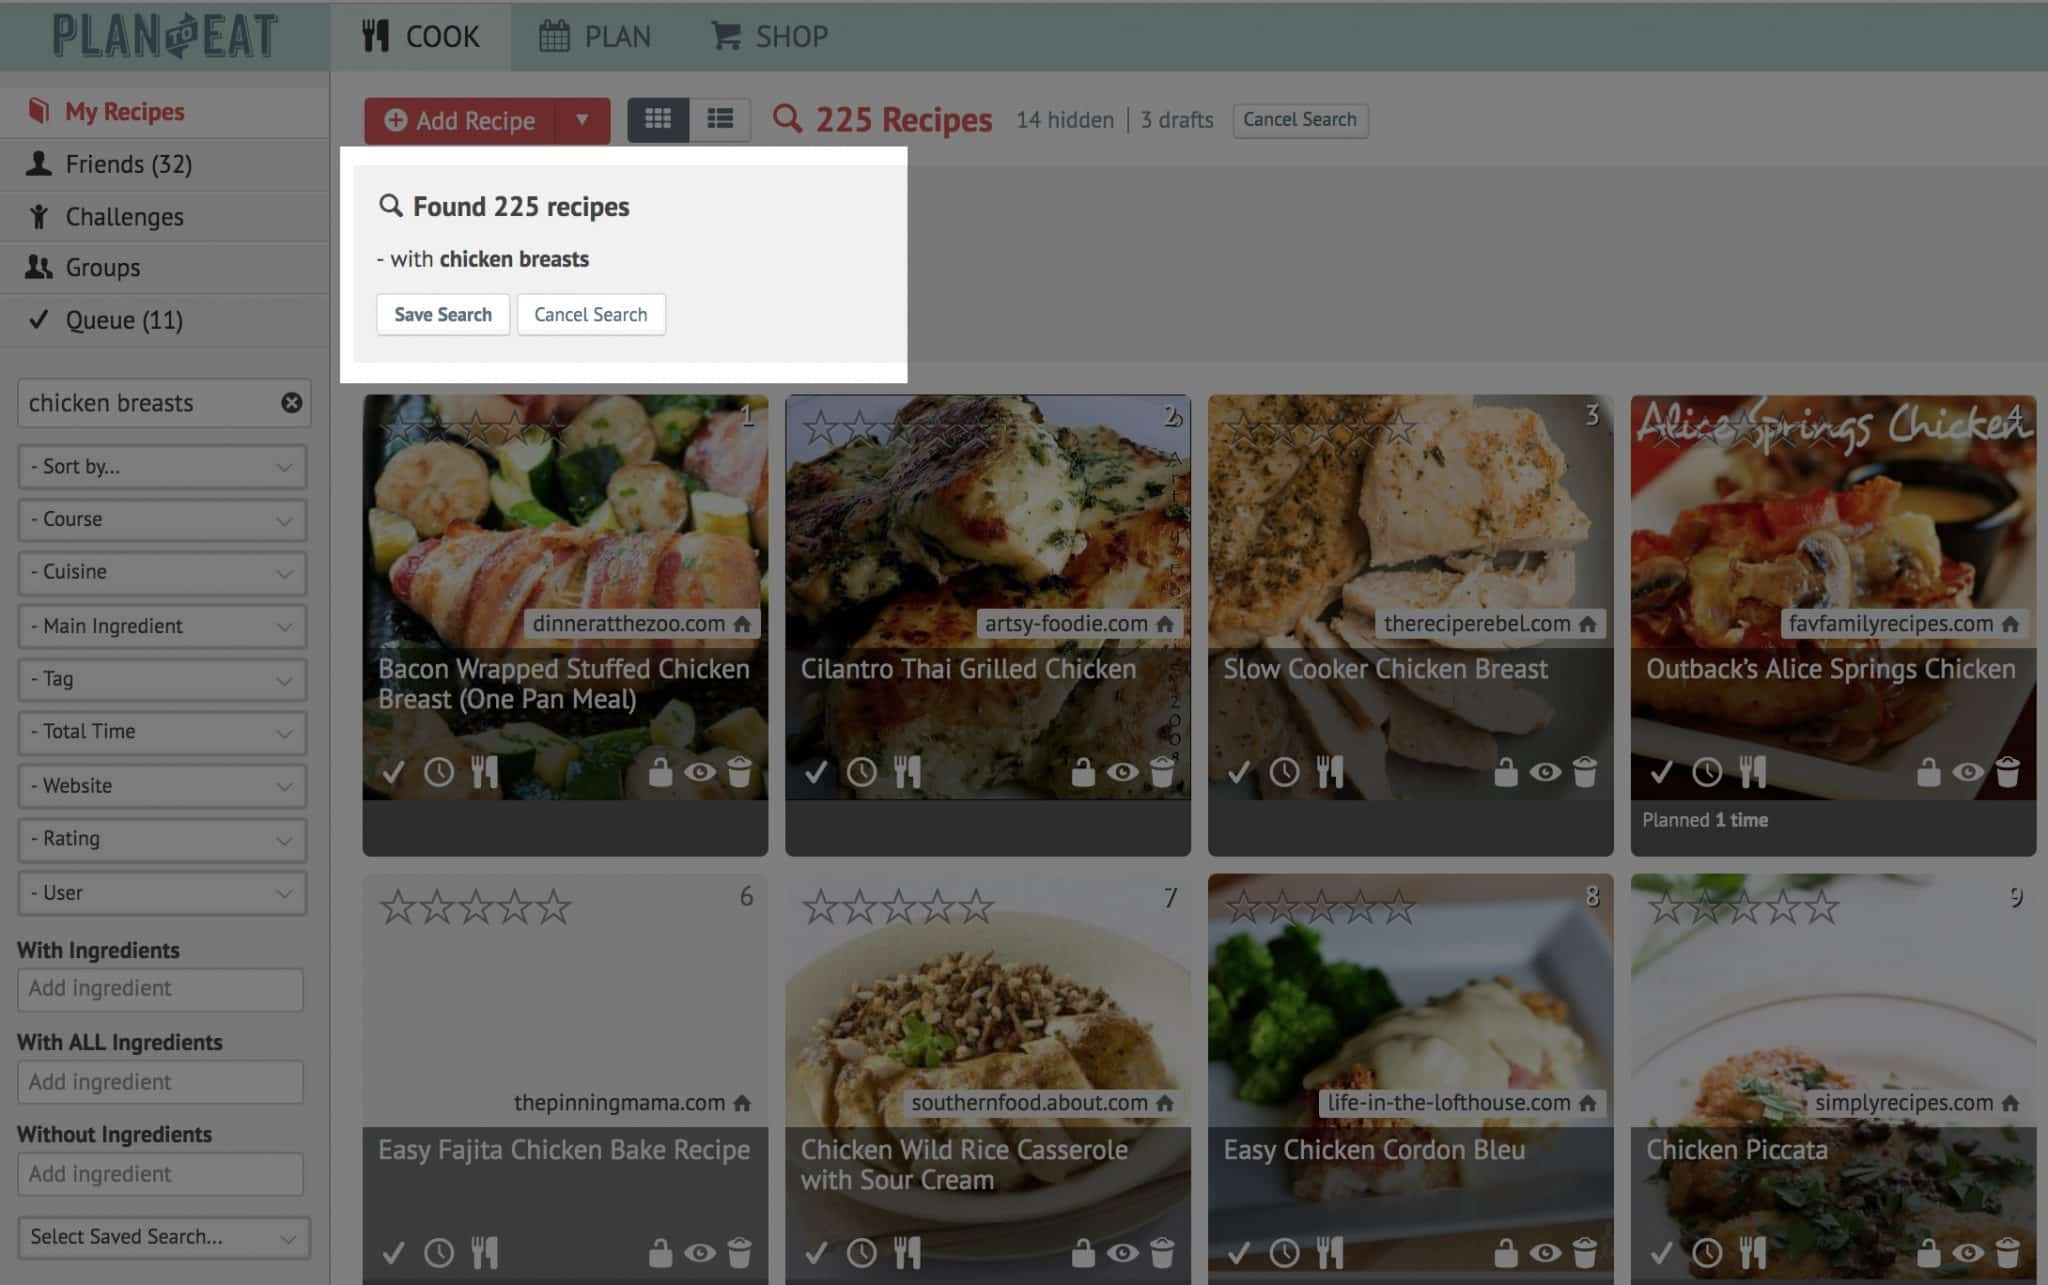
4. When you are ready to use the ingredient from your Freezer, begin by adding a recipe to your Planner that includes the ingredient. In the blog post from last week, we used the Filters to find a recipe we already had, but you can also add a new recipe from any website, using the Recipe Clipper, that uses the frozen items you have on hand. Once the recipe is saved in your Recipe Book, drag it onto your Planner.
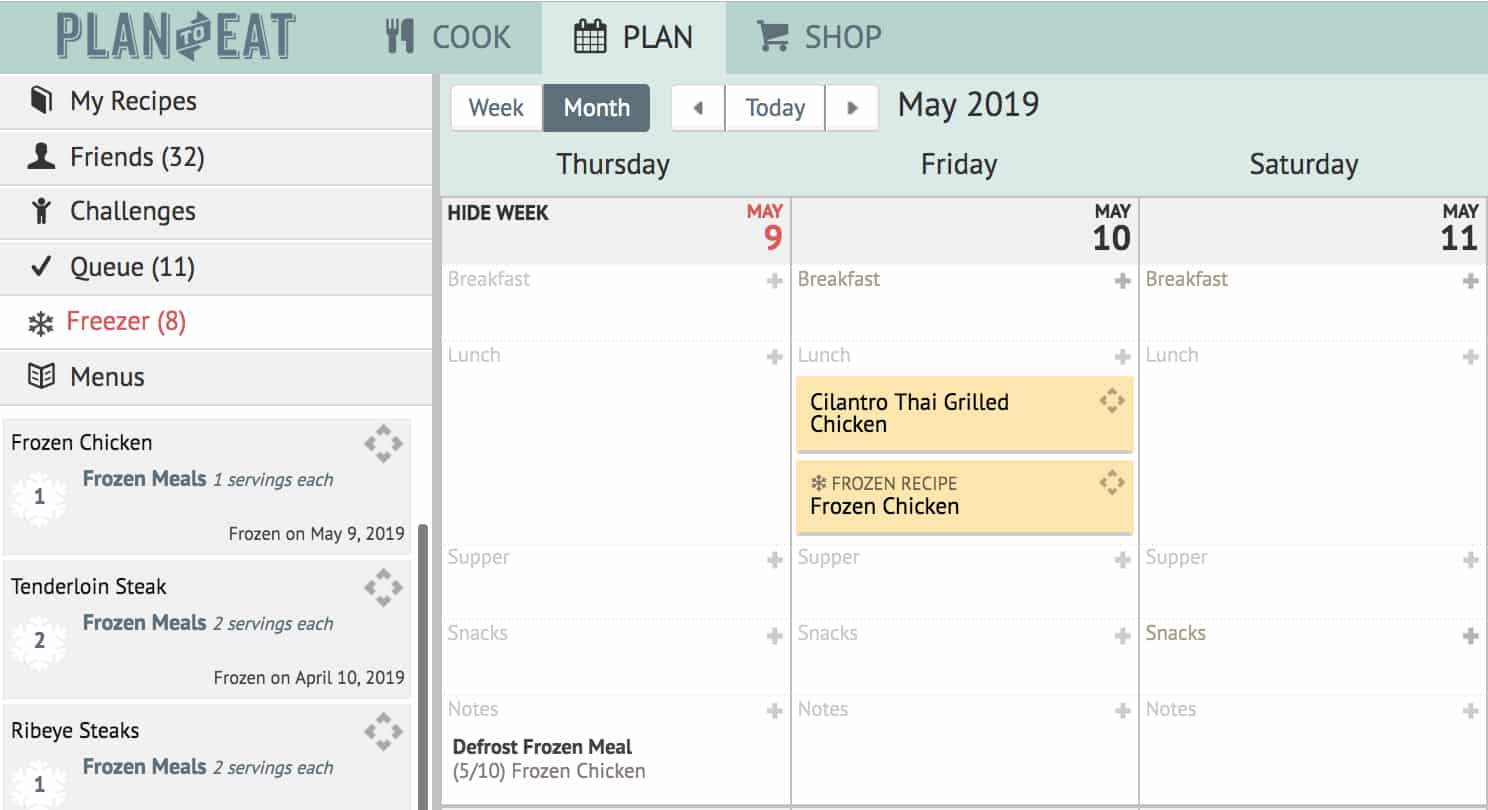
5. Once the recipe is planned, open your freezer section and drag the correct cut of meat to the same date/meal as the recipe that uses it.
A defrost note is automatically added to your planner the day before the planned recipe, so that you remember to pull it from your Freezer.
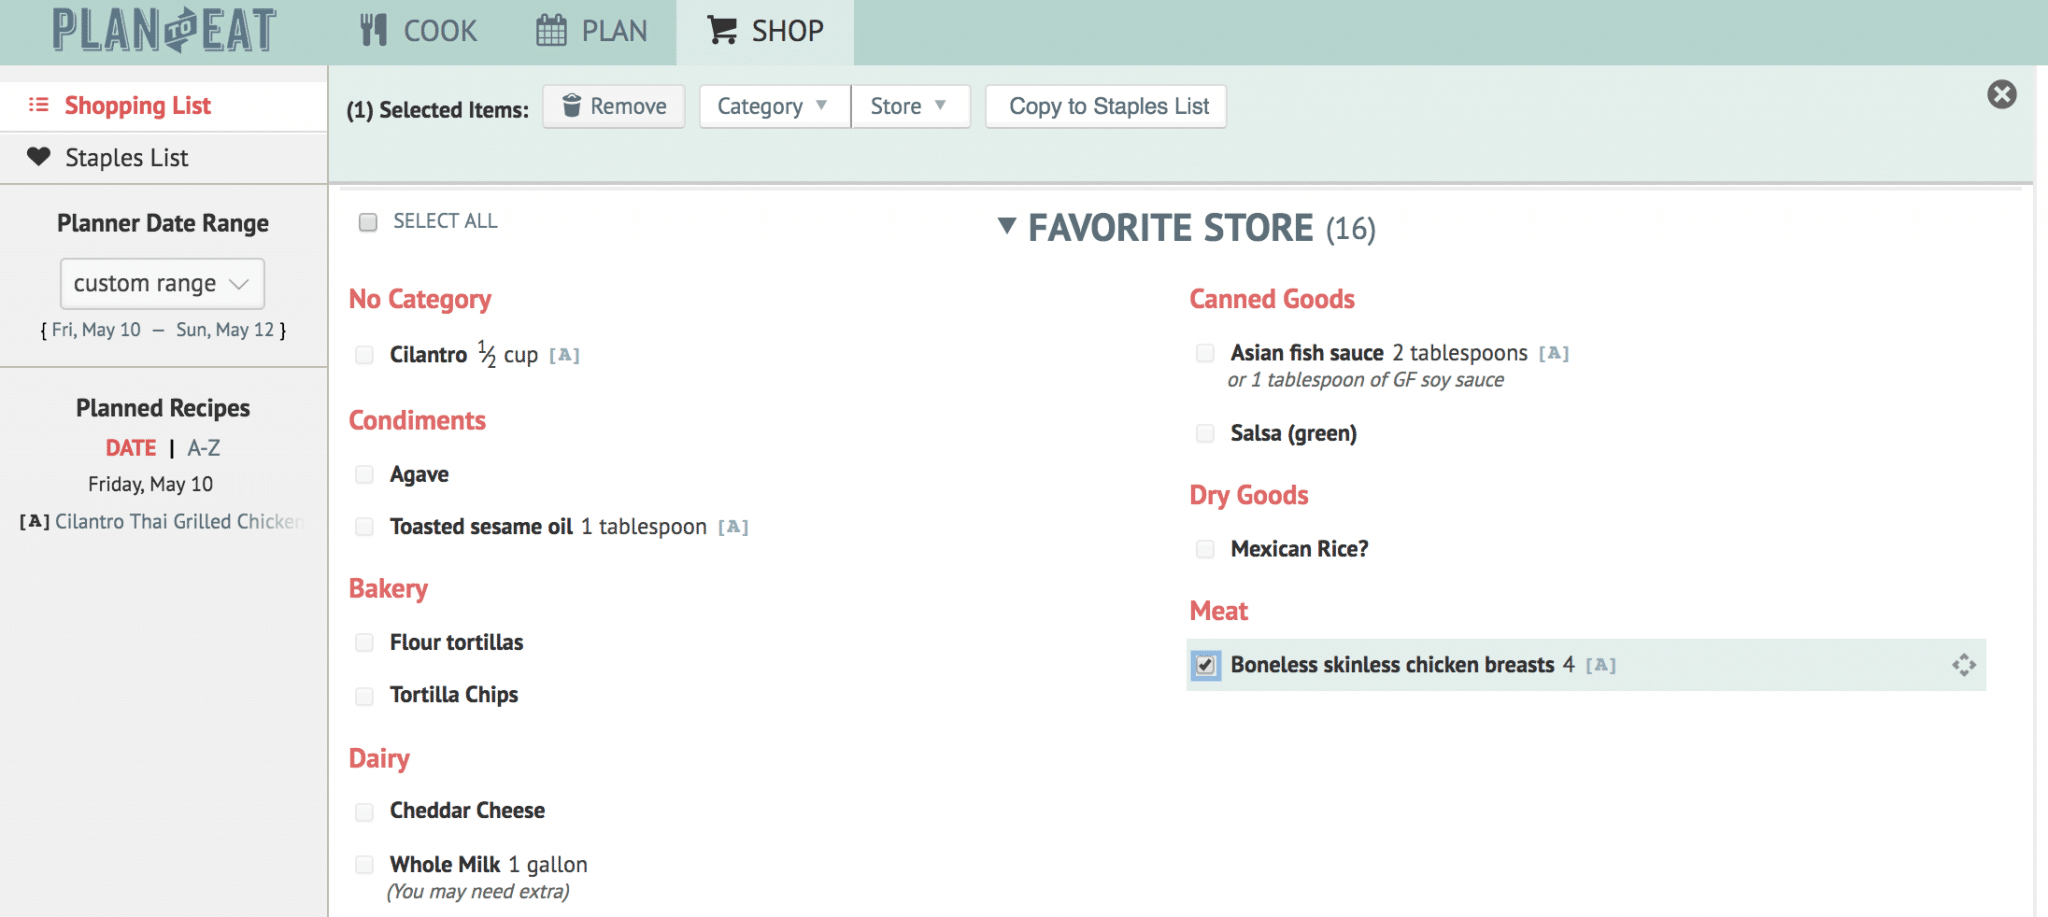
6. Your Shopping List will populate with the items you need to purchase for your planned meals. Remove items you already have from your Shopping List, including the chicken included in the recipe. You already have that item in your Freezer!
We know this will streamline your planning-cooking-shopping experience and makes you feel like a true meal planning pro!
This feature is currently available on the desktop site only, but will be launch in the app in coming months! Stay tuned.