Blog

The Shopping List. This is a hot topic in our support site and one that I want to help you understand so that grocery shopping can be easier for you. With recent — and pretty exciting! — updates to the shopping list, I also wanted to put together a post that shows you what’s new, the basics of how to use the list, and how you can use it to your advantage.
If you don’t find what you are looking for, please shoot me an email at [email protected] or post a comment to this post. I would love to help you.
Here we go. The Basics:
Date Range
When you add recipes to your Planner, the ingredients listed in them will be automatically placed on your Shopping List. Make sure that your Date Range (located in the left hand menu) is set to the correct range of dates that you are getting ready to shop for.
Stores (new features!)
You can now add, remove, or rename any grocery store by opening the Manage Grocery Stores window.
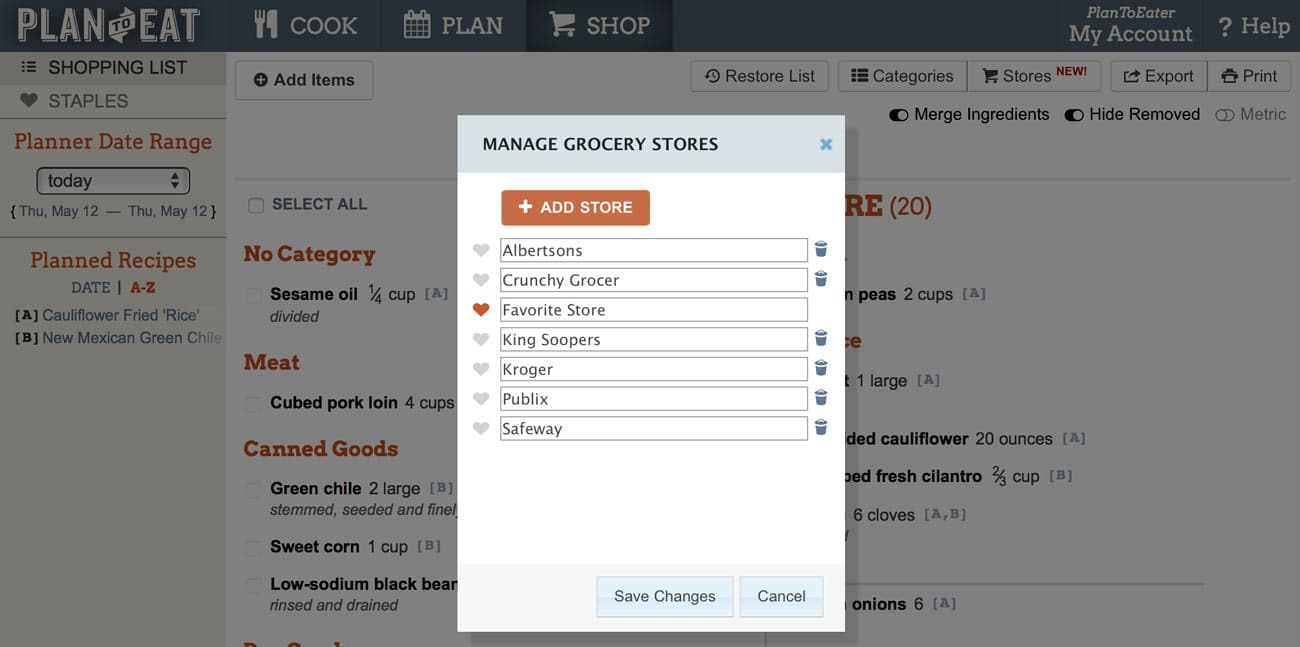
You can also now select your Favorite Store (previously referred to as the Default Store) by selecting the heart icon to the left of the store name. Your Favorite Store is where Plan to Eat will automatically place items until you decide that you want that item placed in a different store. Plan to Eat will remember which store you prefer and place it there in the future.
Move items from one store to another by placing a check mark next to the item and select the store that you would like to move it to in the store dropdown list
Another new feature with the list is that you can toggle your stores open and closed directly on the Shopping List to more easily manage your list.
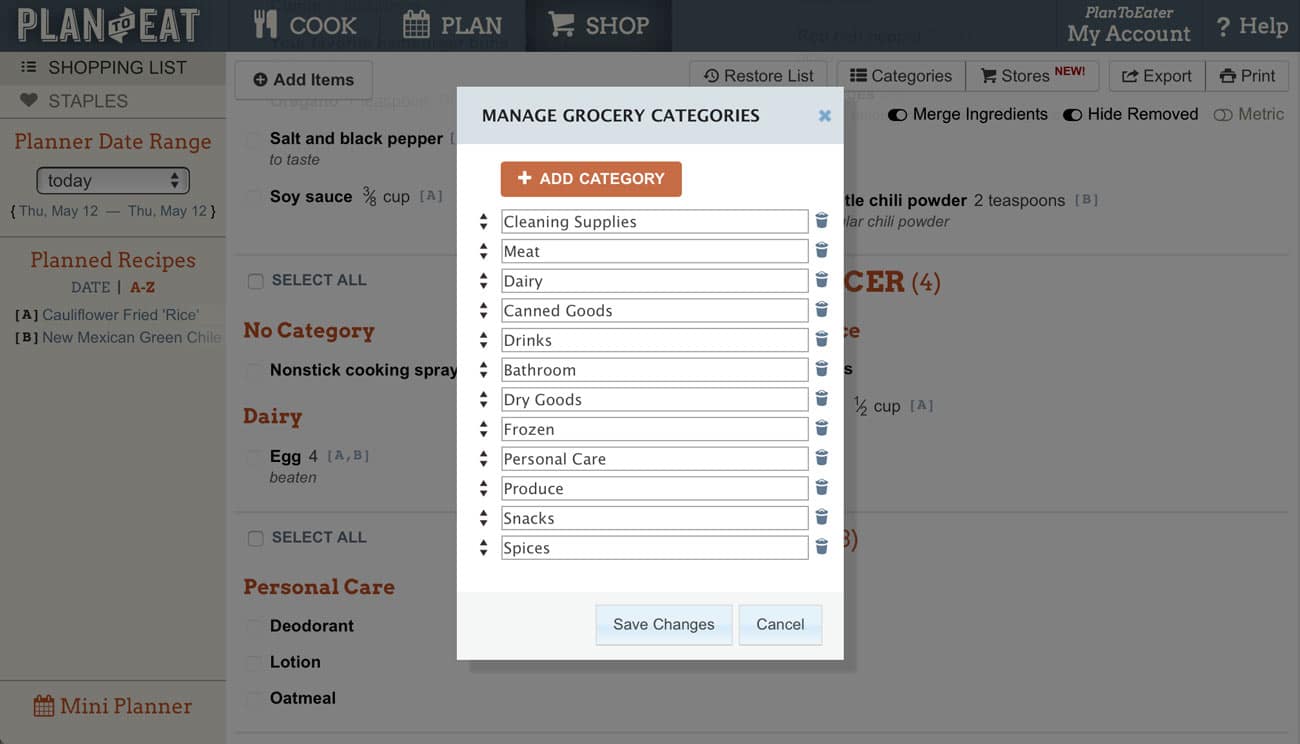
Categories
After your stores are created, you may want to arrange your list into Categories in a way that makes the most sense to you.
Some people like to be very specific with categories such as “Aisle 6: Spices”. We find that it is better to use more general categories like “Spices” so that when your store surprises you by rearranging their layout — and they will! — you have a list that is easily adaptable because it is organized by general categories. This also makes your categories more useful if you shop at multiple stores that may be arranged differently.
Press the Categories button at the top of the shopping list to rearrange, add, or remove personalized categories within your stores.
You can move items into a different category by selecting the item and selecting that category that you would like to move it to.
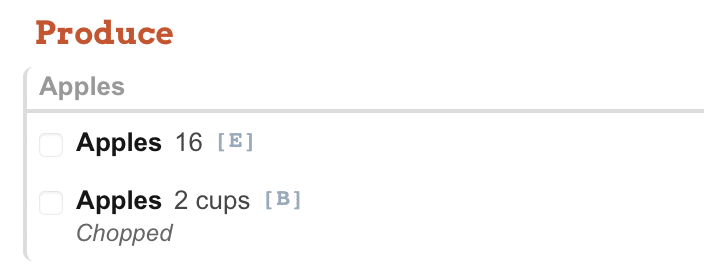
Grouping Ingredients
Items that are similar, but different enough that they can’t be merged, will be grouped together. This typically happens when two recipes have similar ingredients, but incompatible quantities. For example, if one recipe calls for 8 Apples while another calls for 2 Cups of Apples, the two will be listed on separate lines, but placed together in one grouping. Plan to Eat does not make assumptions about how many cups 8 Apples will make, so the two items are left separate for you to decide. If you change one of the recipes to make the two items use compatible units, the items will be merged together.
Merging Ingredients
Items on your Shopping List must be compatible to automatically merge. This means that the name must match, and the units must be compatible. For example: 4 onions and 1 cup chopped onions will be grouped together, but listed as two items on your list, even though you simply need to purchase onions. 1 cup chopped onion can be updated to 1 onion (the estimated equivalent to 1 cup chopped) and the two will merge and become 5 onions on your list.
Specific ingredients can be edited directly from the shopping list by pressing the Edit Item button (the pencil icon) and changing the ingredient name or quantity. The “Also change recipes with the title” checkbox will change the original recipe with your update so that you will not need to make this change to the ingredient in the future.
The Merge Ingredients toggle at the top of your list will turn this off to see each of your items listed individually.
Add Items
The Add Items button at the top of your list allows you to add items manually. This is useful for items that you need that are not a part of your planned recipes.
Unlike items on your list that come from recipes, manually added items do not have a date associated with them. This means that they will remain on your list, regardless of the date range that you set your shopping list to. If you are seeing manually added items from previous shopping trips, you simply need to remove them or restore your list.
Restore List
The Restore List button will simultaneously restore items to your list that have been removed, and remove items that have been manually added. This is the button to press when you need to start over.
Remove Items
To Remove Items, hover your mouse over the item and use the trashcan icon located to the right of the ingredient to hide it from your list.
Remove multiple items by placing a check box to the left of the ingredient names and press the Remove button.
Use the Hide Removed toggle at the top of your list to show removed items. They will appear listed with a line through them.
Our recommended workflow:
- Plan your recipes.
- Click over to your Shopping List and select the date range that you would like to shop for.
- Set up your Stores and Categories if you haven’t done that already.
- Organize your items into their appropriate Stores and Categories.
- Add any manual items that you can think of.
- Take a quick glance through your Staples List to see if there are any non-recipe related items you might be forgetting.
- Take your list into your kitchen before heading to the store (I log into Plan to Eat on my phone for this step). Remove items that you already have and take a moment to add other items that you may need. This will ensure that you see exactly what you have at home and what you need to purchase.
- Print out your list and head to the store.
(According to our survey, the average time from planning recipes to being out the door and on your way to the store is 26.7 minutes.)
FAQ’s of the Shopping List:
My menu is planned but there is nothing on my Shopping List. What went wrong?
If you are confused about why your Shopping List is empty or missing a few items, here are a few key places to check:
- Is your date range set to the correct dates?
- Do your planned recipes have ingredients correctly saved in them?
- Use the Hide Removed toggle in the top right corner of your list to look for missing items. If you find them, use the Restore List button to bring all planned ingredients back to your list.
- If none of these options allow you to find your missing items, contact us, and we will help you figure out where they are!
Basic ingredients like salt or water appear on all of my shopping lists. How do I prevent this from happening?
Plan to Eat does not make assumptions about what you have or don’t have, even with really simple and common ingredients like salt or water, so these common ingredients will appear on almost every shopping list. You may not want to see salt & pepper, water, or even flour, continually appearing your list because these are items most of us have on hand.
The easiest way to handle these items is to remove them like you would with any other ingredient, but an alternative method is to create a store called “In Cupboard” or “On hand” and save these ingredients into that store. When you plan a recipe that includes these items, they will automatically go to that store and be off of your main list. You can ignore this store, or you can Select All and remove the items all at one time.
Do you have a question about your Shopping List that I did not answer?
Let me know in the comments below or email me at [email protected]!