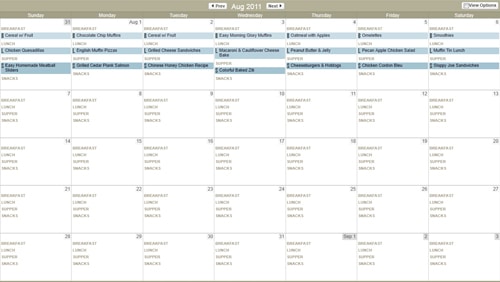
The Meal Planner is the heart and soul of Plan to Eat! And while using the bare bones features of the planner are enough to simplify your life and streamline your menu planning process, there are many additional options that help you get even more out of the system.
Let’s take a look at some of them here.
Change Your Settings
To see all of your settings, click gear icon at the top of your meal planner.
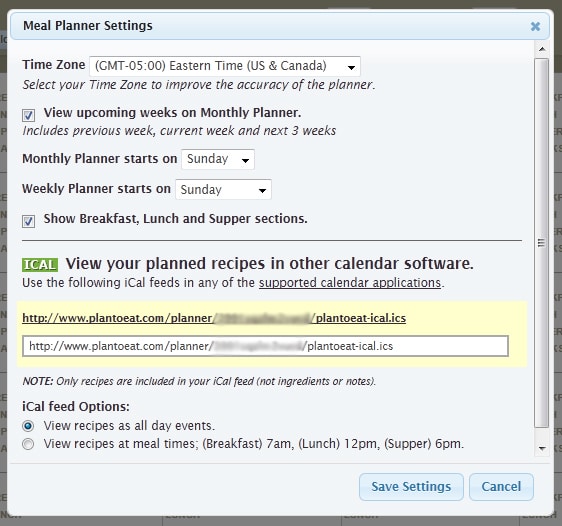
Click on Settings on the options menu to change the following settings:
- Current time zone
- Choose View upcoming weeks on Monthly Planner to show the current week, previous week and next three weeks as opposed to the current month as a whole.
- Decide whether your monthly and weekly planners should start on Sunday (default) or another day.
- The planner shows separate sections for Breakfast, Lunch & Dinner. Unselect this box to remove these sections.
- Copy your iCal feed address.
- Select whether you’d like meals to show up as all day events or scheduled events.
Save & Load Menu Plans
Another feature of the Meal Planner is the ability to save meal plans from a set date range and then load those menu plans at a later time so that you’re not reinventing the wheel every time. How cool would it be to have 2-3 months of weekly meal plans saved so that you can reload them in a regular rotation?
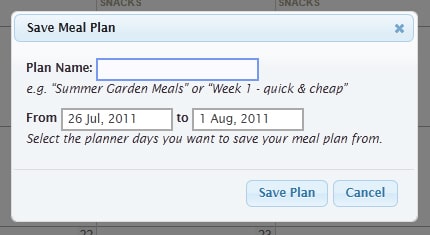
To save your meal plan, select Save from the option menu. In the dialogue box that loads, name your plan and select the dates you’d like to save. Then click Save Plan.
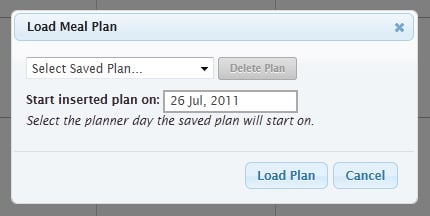
When you’re ready to load a meal plan — either one you’ve saved or one from your Plan to Eat friends — click Load Plan. Select the plan you’d like to load from the dropdown menu and enter a date for the plan to start. Then click Load Plan again.
Show Serving Size, Calories + More
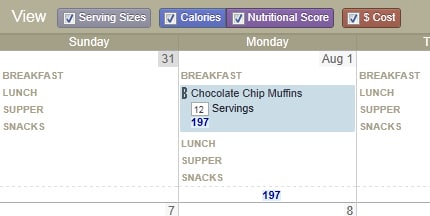
Finally, you can add information to your recipes including serving size, calories, nutritional score and cost, which you can then display on your Meal Planner.
Check these boxes at the top of your meal planner to show any or all of this additional information:
- The servings appear as a number within an editable box, so if you decide to make more or less of a recipe, you can update the servings and the amount of each ingredient will be updated on your shopping list as well.
- Calories show up underneath the recipe title (and serving size if applicable) in blue. Nutritional score will show up here in purple, and the cost will show up in red. At the bottom of each day, the calories, nutritional score and cost will be totaled as well.
By fully utilizing these features, you can see how your meal plan stacks up nutritionally and make sure it falls within your grocery budget. You can also streamline your meal planning process even further and customize your meal planner to reflect your preferences.
Do you use the additional features of the Meal Planner? What other tricks am I forgetting?

