Blog /
Start This Recipe about 30 minutes before you want to eat it
Dinner Table Rating ![]()
![]()
![]()
![]()
![]()
![]()
1 thumb per family member
Cook’s Rating ![]()
![]()
![]()
Accessibility of ingredients, ease of preparation, and affordability
There’s a fierce competition in the garden between the green beans and the summer squash. Both are trying to overtake the vegetable drawer in our fridge. We’re starting with green beans this week, and then next week we’ll try to do something with that squash. My equation at the top reflects the fact that we tried two green bean recipes in the same week, and yet I still have a bag full of beans in the fridge and more on the vines to be picked tomorrow. Don’t get me wrong. I am not complaining. I just feel the irony of having so much now to the point of giving it away, and then in January longing for anything fresh and green.
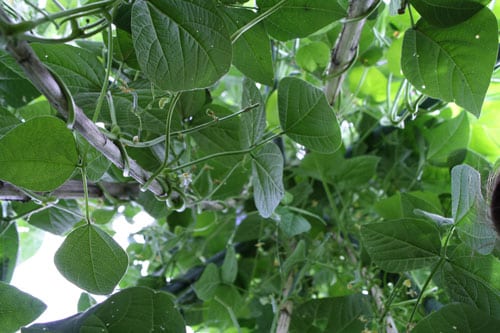
The green bean teepee has become a tradition in our garden. The Bean insists on planting one every year, hence his nickname. This year we had to think of a way to improve on the standard green bean teepee and came up with the cucumber tunnel, which leads into the green bean teepee. It’s a winner. The Bean spends hours hiding out inside his teepee with his Star Wars Legos. But I’m not sure how we’re going to top it next year. We like to plant morning glories in with our beans, so once the beans start winding down we still have a nice-looking teepee until it freezes.
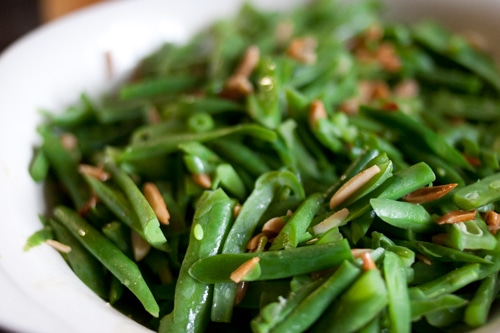
Anyway, back to the recipes. These are nice, simple side dishes, perfect for summer garden produce. Our family gave it three thumbs up at the dinner table, but don’t let that deter you. One thumb was withheld by the Peanut, who is intrigued by the color of beans, but not the flavor. One thumb was withheld by the Pickle, who doesn’t like things “all mixed up together” (referring to the onions and almonds). And one thumb was withheld by yours truly, simply because green beans and almonds and onions aren’t on my menu right now due to food allergies. But if I could have eaten it, you bet I would have.
I chose to not award the star for ease of preparation. For a while I was very generous in awarding the Ease of Preparation star, but I’m feeling less-so the more I cook from Nourishing Traditions. It’s not that the process was hard, it’s just that it was harder than my usual method of pick, rinse, toss in the pan with garlic and lemon. In the future, the recipes will have to meet my regular standards of what qualifies as “easy” in order to get the star. It’ll be tough.
Green Beans with Onions or Almonds (Nourishing Traditions, p 370-371)
- 1 1⁄2 pounds string beansFrench cut
- 4 tbsp good-quality butter
- 1⁄2 cup dehydrated onions or crispy almond slivers (p 515)
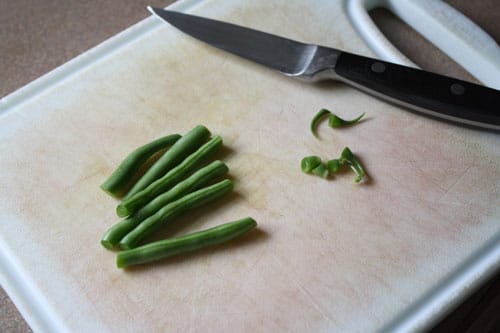
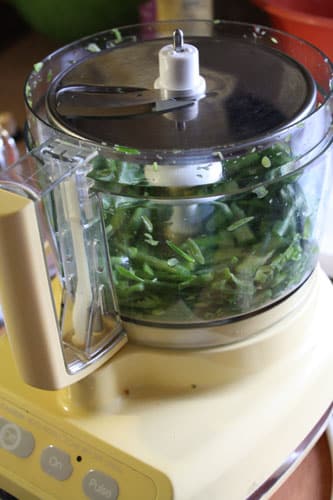
1. To “French cut” your green beans, trim the ends and cut into 2″ pieces. Drop into the feed tube of food processor fitted with the slicing attachment.
I confess to being slightly suspicious of this method. I really didn’t think it would be that successful, or worth the effort. But I have to say I was pleasantly surprised at the dinner table when everyone commented on how much they liked the “fancy cut” green beans. This method is especially useful if you have a 5-year-old doing your harvesting, so that any bean above his eye level gets grossly overgrown. This method did a nice job of making palatable slivers of those tough, fat beans. Verdict: I’ll be using this method again whenever I have the bit of extra time and energy it requires.
2. Steam beans in a vegetable steamer for about 8 minutes, until bright green and just tender.
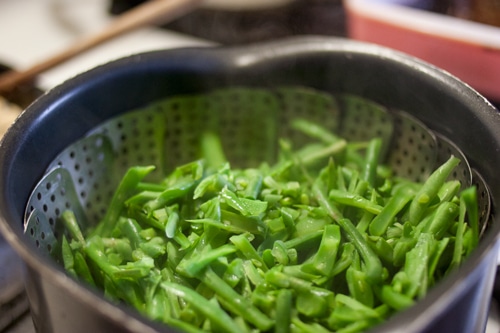
I only steamed my beans for 5 minutes. I felt like any longer and they would be getting drab and slimy. Whether that’s due to my stove or altitude to just general preference, I don’t know. Just steam your beans until they’re done to your liking.
3. While the beans cook, melt the butter in a frying pan. Add the onions (or almond slivers) and cook, stirring constantly, until lightly browned. Be careful not to burn them!
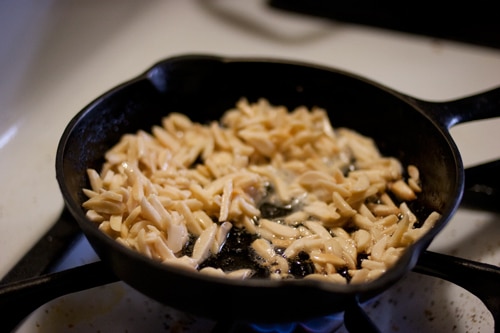
I tried one batch with the full amount of butter, and the next batch with half of the butter. It’s a matter of preference, but my family preferred the one with half the butter so that’s the way we’ll be making it in the future. Whichever add-in you use, and however much butter you use, don’t leave this skillet for a second. Little almond slivers (or little onions) have a tendency to go from raw to burned in about 30 seconds. Keep a close eye on it!
If you’re wondering what dehydrated onions are, I found them in the bulk section of my natural food store. Here’s what they looked like:

I’m pretty sure I’ve seen these at big warehouse clubs and regular grocery stores too, but this is the first time I’ve tried to cook with them. They turned out nicely and everyone liked them. Sweetie Pie said they tasted a lot like those french fried onions that you put on green bean casserole.
4. Toss the butter and onions (or almonds) with the beans and keep warm in the oven until ready to serve.
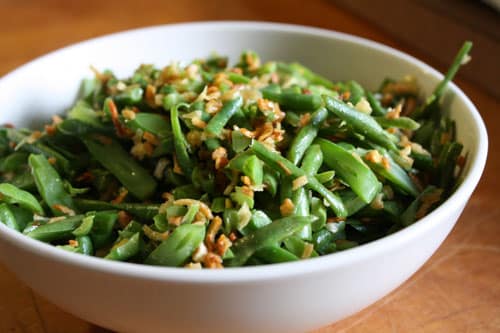
I’m calling these recipes a success. I’m most excited about knowing how to “french cut” my green beans without an expensive bean frencher. I can see myself using this method again and experimenting with different mix-ins–or perhaps none at all to appease the Pickle who would prefer his green beans naked.